+86-0574-63316601


 中文简体
中文简体Content
- 1 What Counts as a Custom Wiring Harness?
- 2 Step 1: Define Electrical and Mechanical Requirements
- 3 Step 2: Select Wires, Connectors, and Protective Components
- 4 Step 3: Create the Harness Drawing and Routing Plan
- 5 Step 4: Prototype, Test, and Validate
- 6 Step 5: Set Up for Production and Quality Control
- 7 Common Mistakes to Avoid When Making a Custom Harness
- 8 Why Working with a Factory Makes Custom Harness Development Easier
When an appliance brand needs a wiring harness that fits a new product design perfectly, the question "how to make a custom wiring harness" usually means something more specific: how to turn a concept into a reliable, manufacturable component that passes testing and survives years of use in the field. As a wiring harness factory that has produced thousands of custom assemblies for kitchen and environmental appliances, we have seen the full journey from schematic sketch to volume production. This guide walks through the practical steps of making a custom wiring harness, with a focus on what matters most for appliance manufacturers: electrical integrity, mechanical durability, and cost-effective manufacturing.
What Counts as a Custom Wiring Harness?
A custom wiring harness is a bundled set of wires, terminals, and connectors designed for a specific application rather than a generic off-the-shelf cable. In home appliances, custom harnesses are the nervous system of the product. They carry power from the inlet to the control board, transmit signals from sensors and switches, and connect heating elements, motors, and displays. A well-designed harness prevents electrical failures, simplifies assembly on the production line, and makes troubleshooting easier during service.
Making a custom harness is not simply about cutting wires to length and crimping terminals. It requires careful decisions about conductor size, insulation material, connector selection, protective sleeving, and routing. Each decision affects safety, reliability, and cost. When an engineer asks how to build a custom wiring harness, the answer must begin with engineering requirements, not with tools and crimpers.
Step 1: Define Electrical and Mechanical Requirements
Before any wire is cut, the design must be fully specified. The most important starting point is a clear electrical schematic. This diagram shows every connection point, the expected current load on each circuit, and the signal type—power, ground, data, or sensor. From this diagram, the designer determines wire gauge, insulation rating, and connector types.
The table below summarizes the core parameters that must be defined before making a custom wiring harness.
| Parameter | What to Define | Why It Matters |
|---|---|---|
| Wire gauge (AWG or mm²) | Current carrying capacity per circuit | Undersized wire causes overheating and voltage drop |
| Insulation temperature rating | Maximum exposure temperature | Kitchen appliances generate high heat near heating elements |
| Insulation material | PVC, silicone, XLPE, etc. | Chemical resistance, flexibility, and flammability rating |
| Connector and terminal types | Manufacturer, series, pin count, locking mechanism | Mating with control boards and power components |
| Operating environment | Temperature range, vibration, moisture, chemicals | Determines sleeving, sealing, and strain relief needs |
| Applicable safety standards | UL, IEC, CCC or regional requirements | Market access and certification requirements |
At this stage, working with an experienced manufacturer is valuable. A factory that builds harnesses for appliances across categories such as 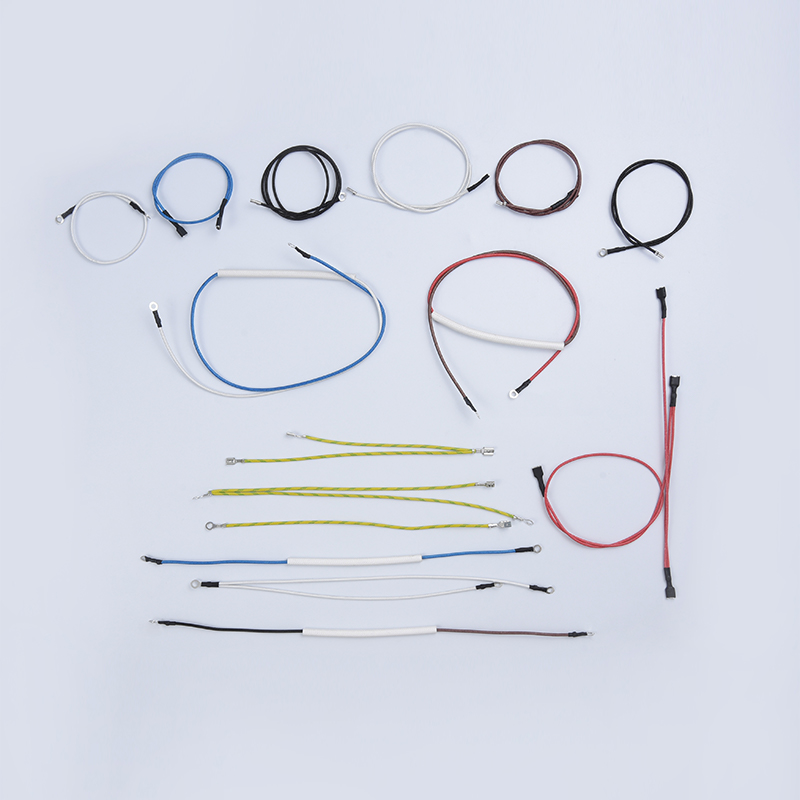 Air Fryer Wiring Harness Supplier for Heat-Resistant Appliance ConnectionsThis supplier specializes in air fryer wiring harnesses, relevant here because the surrounding text discusses material selection for high-temperature zones, where silicone or cross-linked polyethylene insulation is required.View Product → and electric ovens can advise on material choices that balance cost with performance. For example, silicone insulation handles heat well but costs more than PVC; the right choice depends on where the harness will be routed in the final product.
Step 2: Select Wires, Connectors, and Protective Components
Once the requirements are clear, the next step is selecting components that meet the specifications. Wire selection must consider both conductor material and insulation. Tinned copper is common in appliances because it resists corrosion and provides a better connection than bare copper in humid environments. For high-temperature zones, such as near an oven heating element or inside a deep fryer base, heat-resistant insulation like silicone or cross-linked polyethylene is necessary.
Connector selection is equally critical. A connector with insufficient current rating will overheat, while a connector with poor contact retention can cause intermittent failures during product use. Standardized connectors from well-known manufacturers are preferable because they are easier to source, more reliable, and simpler for service technicians to replace. The table below compares common connector types used in appliance wiring harnesses.
| Connector Type | Typical Applications | Advantages | Considerations |
|---|---|---|---|
| Wire-to-board connectors | Control board connections | Compact, low cost, suitable for signal and low current | Current limit; requires secure locking for vibration |
| Wire-to-wire connectors | Power connections between components | Easy assembly and disassembly, supports higher current | Larger footprint; needs strain relief |
| Ring and spade terminals | Ground connections, heating elements | Simple, reliable, high current capacity | Requires screw or stud mounting; vibration loosening risk |
| Molex-type pin housings | Internal signal and low-power connections | Polarized, keyed options, available in many circuits | Tooling cost for pin crimping; quality depends on crimp |
Protective sleeving and strain relief are often overlooked but essential for durability. Braided sleeving protects wires from abrasion, spiral wrap provides flexibility and protection in tight spaces, and heat shrink tubing secures connections and prevents moisture ingress. For harnesses that will be flexed during product use, such as a coffee maker door connection or a garment steamer handle cable, strain relief at both ends is a requirement, not a suggestion.
Step 3: Create the Harness Drawing and Routing Plan
The next step is creating a detailed harness drawing. This drawing is more than a schematic; it is a manufacturing document. It defines the exact length of each wire segment, the position of every branch point, the location of terminals and connectors, and the wrapping or sleeving material. A good harness drawing includes a routing diagram that shows how the harness bends around physical features inside the appliance. Proper routing prevents pinching, sharp bends, interference with moving parts, and exposure to excessive heat.
For complex appliances like washing machines, air conditioners, and induction cookers, the routing plan must account for vibration, moisture, and the possibility of condensation. Our experience with 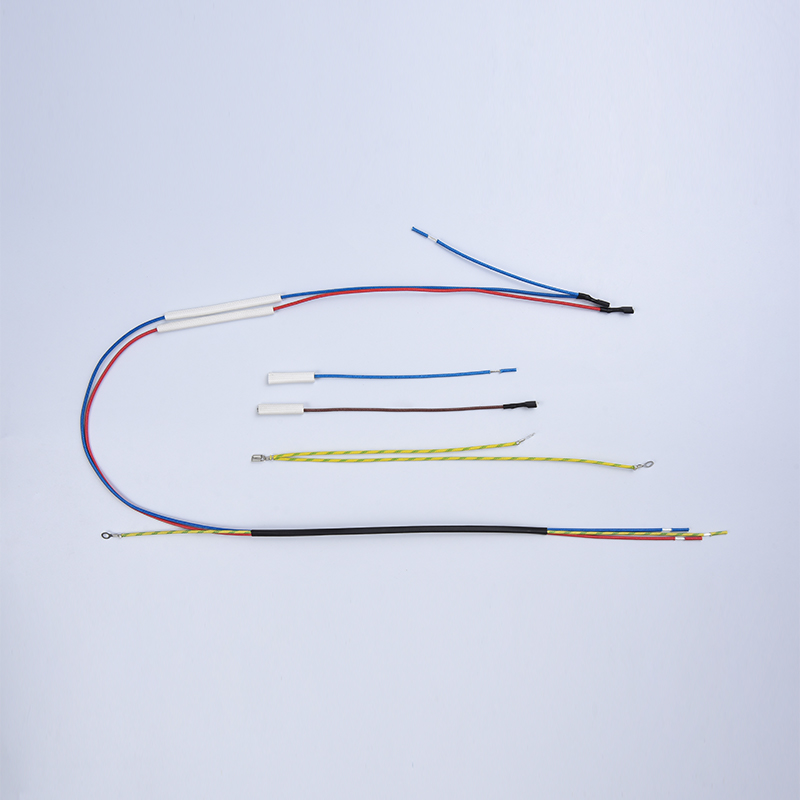 Coffee Machine Wiring Harness Supplier for Custom Appliance PrototypingThis supplier offers coffee machine wiring harnesses, fitting the context of prototyping and testing harness performance, including continuity and insulation resistance, for complex appliances.View Product → and water purifier harnesses shows that a well-planned routing diagram reduces assembly time and minimizes field failures. When engineers understand how the harness interacts with the mechanical structure of the product, they can avoid many problems before the first prototype is built.
Step 4: Prototype, Test, and Validate
Prototyping is where the custom harness becomes a physical part rather than a drawing. In this phase, samples are built using the chosen wires, terminals, and connectors. The prototype must be tested for electrical continuity, insulation resistance, and dielectric withstand voltage. These three tests verify that the harness is wired correctly, that insulation prevents leakage current, and that the harness can withstand normal operating voltage without breakdown.
Functional testing inside the actual appliance is the final validation. The prototype harness is installed in the product, and the appliance is operated under normal and abnormal conditions. Temperature rise testing is especially important for heating appliances. A harness located too close to an air fryer's heating element or an oven's cavity may exceed its insulation temperature rating, leading to premature failure or safety hazards.
Testing data helps refine the design. If a wire shows higher than expected temperature rise, a larger gauge may be needed. If a connector resists mating too strongly, the terminal crimp depth or connector brand may need adjustment. This iterative process is valuable precisely because it catches problems before production begins. For appliance manufacturers without in-house testing capability, a factory that offers sample production and testing support is a practical partner, as discussed in our guide on the importance of wire harness factories in home appliance production.
Step 5: Set Up for Production and Quality Control
After the prototype passes validation, the custom wiring harness moves to production. A well-equipped factory uses a combination of automated cutting and stripping machines, semi-automatic crimping presses, and manual assembly benches with precise work instructions. The key to consistent quality is a clear process flow: cut and strip wires, crimp terminals, insert terminals into housings, lay wires on the assembly board according to the routing diagram, wrap or sleeve the bundle, and perform final electrical testing.
The assembly board is a crucial part of harness manufacturing. It is a flat board with a 1:1 printed layout of the harness drawing, complete with pins or pegs that hold wires in place. Using an assembly board ensures that every production harness matches the prototype's dimensions and routing. Without this tool, wire length and branch position would vary between units, causing fit problems during appliance assembly.
Quality control does not end with the final electrical test. Incoming inspection verifies that wire rolls, connectors, and terminals meet specification. In-process checks verify crimp height, terminal pull force, and correct connector insertion. Final inspection includes continuity, insulation resistance, and sometimes a high-voltage test on every production unit. A reliable factory maintains records for each batch, enabling traceability if a customer reports a field issue.
Common Mistakes to Avoid When Making a Custom Harness
Over the years, we have seen several recurring mistakes that cause delays and failures. Avoiding these common pitfalls can save significant time and money.
- Undersized wire gauges: Selecting wire based only on the schematic current rating without considering ambient temperature, bundling effects, and voltage drop can lead to overheating. Always apply a derating factor when multiple wires are bundled together.
- Ignoring environmental conditions: A harness designed for dry indoor use may fail quickly if the appliance is exposed to moisture, steam, or chemicals. Use appropriate insulation and protection for the real operating environment.
- Poor terminal crimp quality: A terminal that is under-crimped may pull out of the connector; an over-crimped terminal can crack and cause intermittent contact. Crimp height and pull force must be controlled within specified limits.
- Missing strain relief: Wires that are flexed or pulled without strain relief will eventually break at the connection point. This is a leading cause of field failures in appliances with moving parts.
- Insufficient documentation: A harness without a clear drawing and test record is difficult to reproduce, troubleshoot, or improve. Documentation is part of the product, not optional paperwork.
Why Working with a Factory Makes Custom Harness Development Easier
Developing a custom wiring harness from scratch inside an appliance company can be time-consuming, especially for brands that do not specialize in electrical components. A dedicated harness factory brings experience across many appliance types, established relationships with connector and wire suppliers, and production equipment that is not practical to maintain in-house for small to medium volumes.
Factories also provide value in component selection. For example, a factory that builds both and wiring harnesses for the same appliance type can help a manufacturer coordinate the temperature sensing circuit with the wiring layout. This cross-component knowledge often surfaces during the design review, preventing integration problems later.
When choosing a partner, look for a factory that offers prototype support, clear communication, and a structured approach to testing. A factory that asks questions about your application, environment, and standards before quoting is more likely to deliver a harness that works reliably than one that simply provides a price. If you are developing a new product and need a custom harness that meets your specific design goals, contacting a manufacturer like Tengyu with your schematic and requirements is often the fastest path to a manufacturable solution.
Making a custom wiring harness is a structured process: define requirements, select components, create a detailed drawing, prototype and test, then move to controlled production. By following these steps and working with an experienced factory, appliance brands can avoid the common failures and bring a reliable, cost-effective electrical system to market.